

Source: Medium.design - Medium | Read More
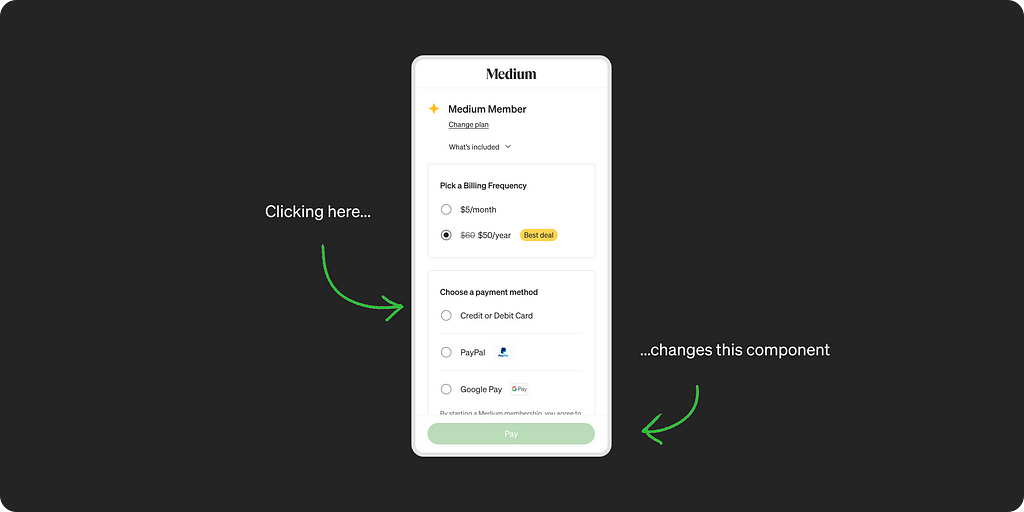
Above is a screenshot of a prototype I worked on for mobile purchase funnel iterations. I work as a product designer at Medium, mostly on conversion and retention projects. I had four candidate prototypes for user tests. On one of them, I wanted the fixed payment button to change when users picked a payment method radio button: it would become a PayPal button, a Google Pay button, and so forth.
But… I went through several tutorials and didn’t manage to make other people’s advice work for my prototype. It took me a few painful attempts and some help from Figma power users to crack this. I’m putting this tutorial out there to save other designers the hassle of going through this.
If you want to follow this tutorial step-by-step with pre-existing components, you can download or copy my Figma file here. I swapped the fonts and simplified the design so nothing would break while you play with it.
For better clarity, I’ll refer to the radio button module as “the controlling component” and the payment button as “the reacting component.”
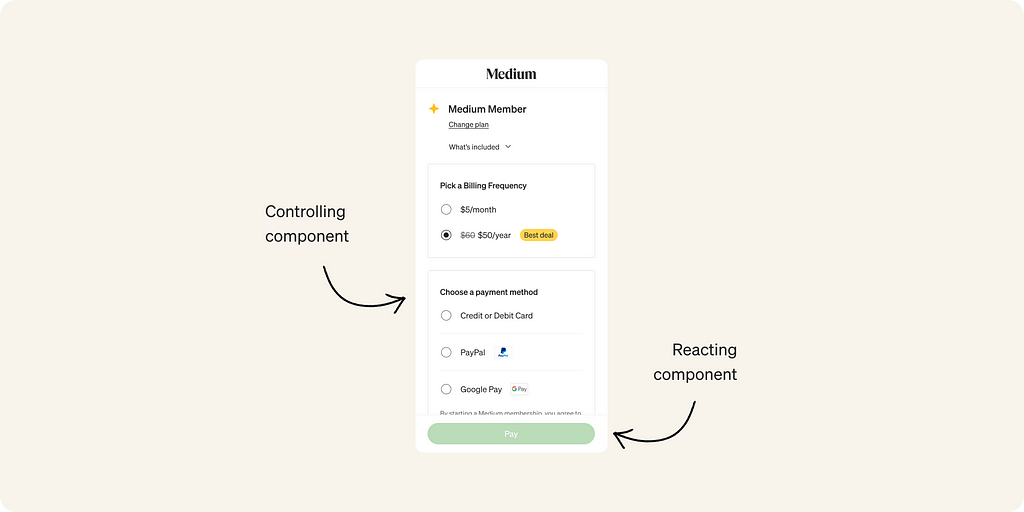
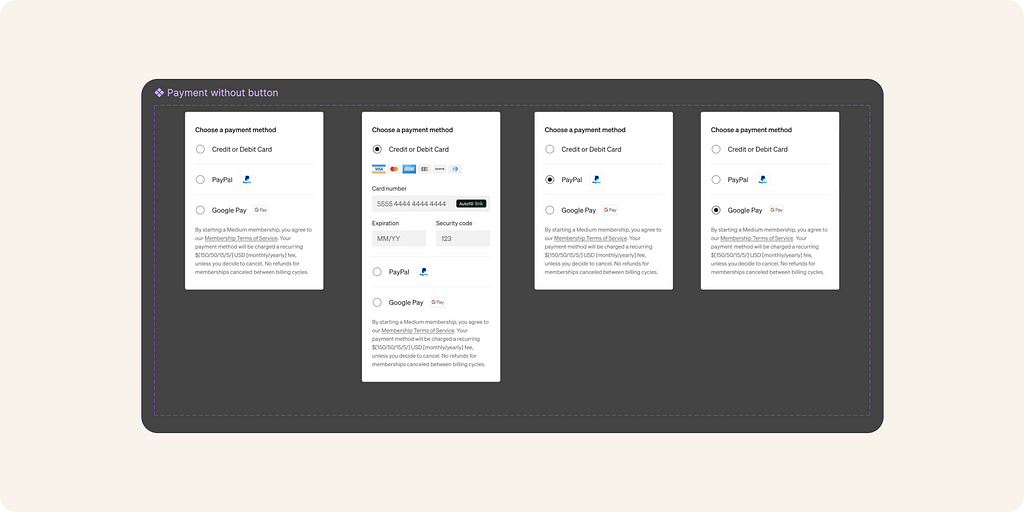
This component is important because it will ultimately trigger the interaction for the reacting component.
In my example, the payment module is my controlling component. I want to create all the states needed for each selected radio-button in the master component.
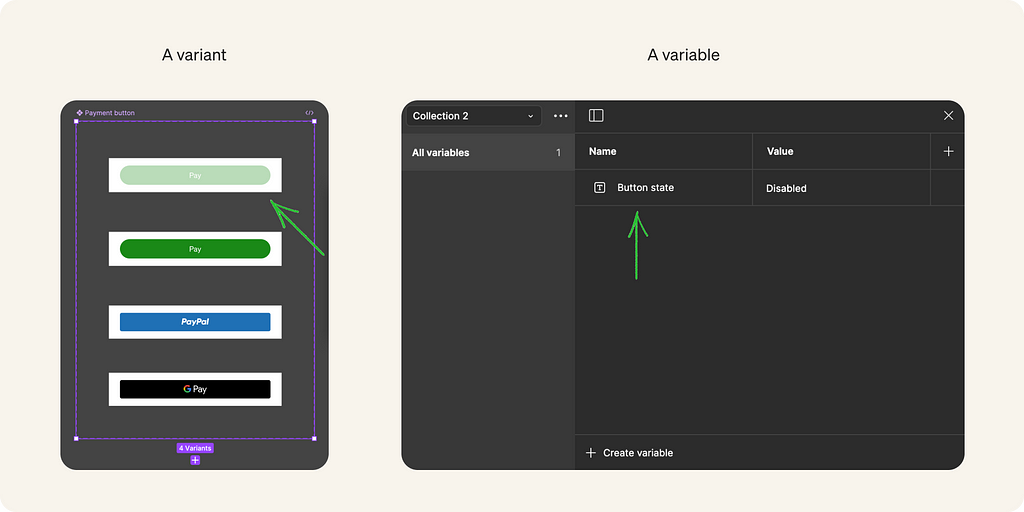
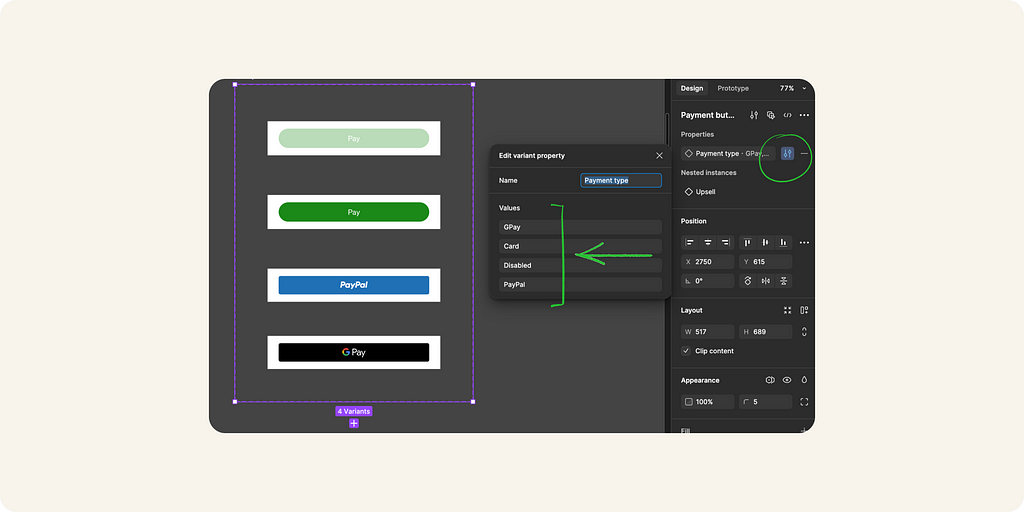
Name your variants for the reacting component’s master. For this component, spelling, spacing and case will matter. Make a note of your choices!
In my example, I capitalized “Card”, and “Disabled”. I also respected the case for “GPay” and “PayPal”. In future steps, I will need to remember those decisions.
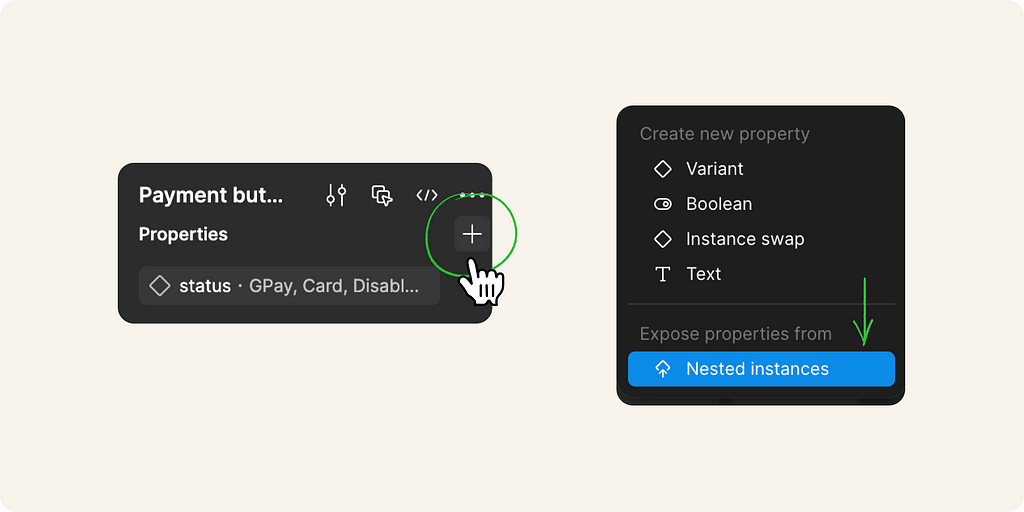
If you nested another component in some of your variants, ensure it’s visible in future instances. Do this by selecting the frame around your variants and then clicking the “+” icon, which is visible when you hover over “Properties.”
The variable is what will allow both components to communicate.
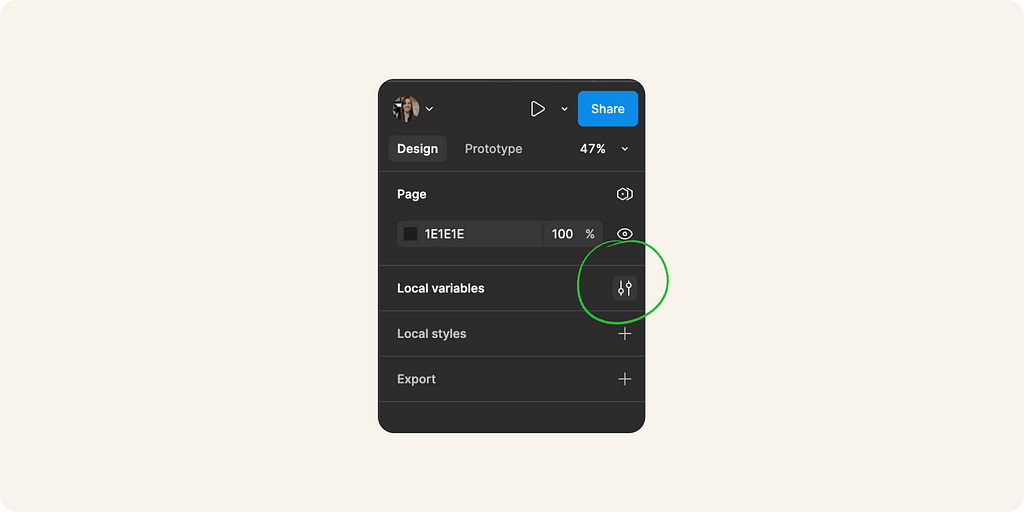
Make sure no element is selected by hitting “esc.” Then go to the Design panel of Figma and select “Local variables”.
From there click on “Create variable” and create a string variable for your reacting component (here in my example it’s a button so I’m calling it “Button state”).
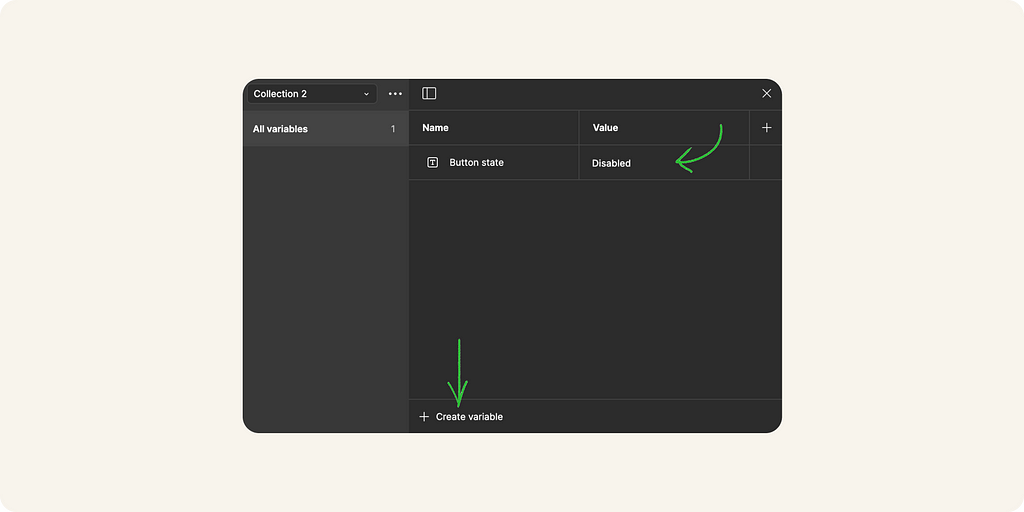
Give the value a consistent name with the component’s default state variant — again, spelling, spacing, and case consistency matter. Think like a programmer, otherwise, Figma won’t connect the dots! Ultimately this variant will control your reacting component’s state and allow you to display the relevant variant.
Switch Figma to the prototype panel and work on your master controlling component and its variants.
In my example, I added interactions for radios on all variants to link them to the right state variant while commanding the variable name for the reacting component, so it could also receive the instruction to change state.
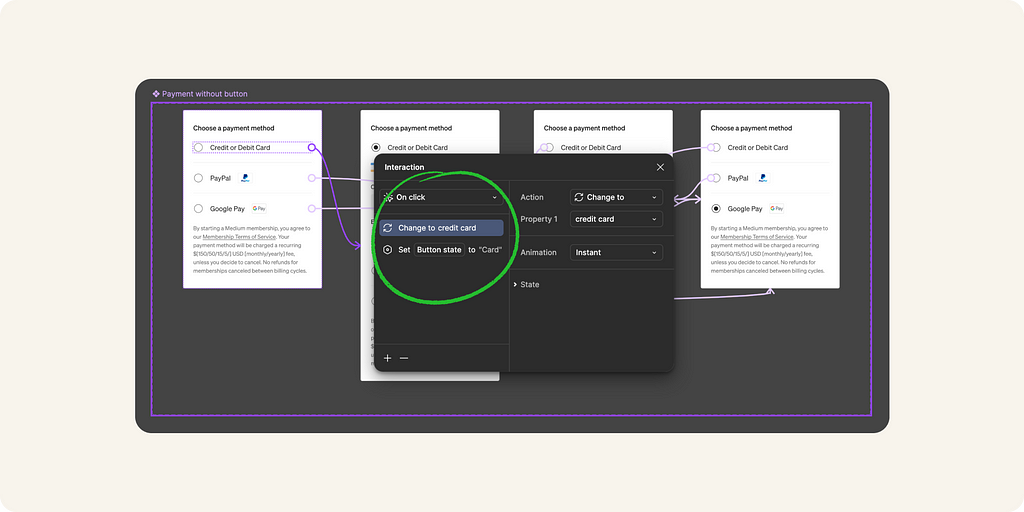
To that effect, for each radio button, I created 2 interactions as follows:
Pro tip: Don’t forget interactions can be copied and pasted, it’s a huge time-saver in this situation as you will need to create them for all radio buttons on all the variants.
Now, leave your master components and build your screen in a frame with instances of both components. Select your reacting component instance. You want to bind it to your variable by clicking on the bolt and selecting the variable you created. Now this component “knows” that the displayed variant state needs to correspond to your variable name as it changes.
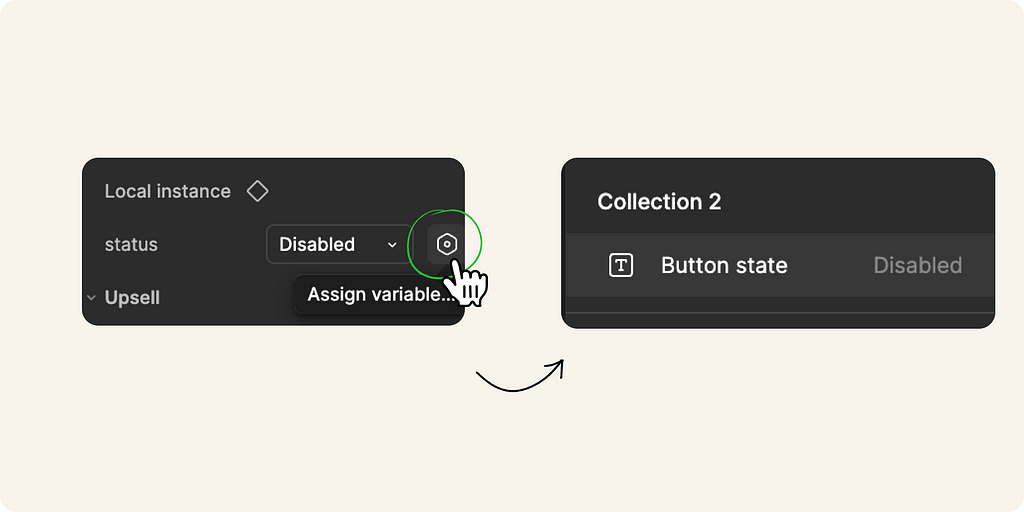
Voilà! Your prototype should work!
But… what happened? Why is it working? When you click on your controlling component, its state changes. But because you bound your variable to the state of your reacting component, your interaction renaming the value of your variable also renames your reacting component displayed variant, allowing it to update simultaneously.
I hope you learned something today! Huge thanks to Alexia Danton (Designer advocate – Figma France) and Romain DAO (Founder—The Cacatoes Theory) for their patience and help, I appreciate you both!
How to Update Two Components Simultaneously in a Figma Prototype was originally published in Medium.design on Medium, where people are continuing the conversation by highlighting and responding to this story.